
Building an AI-Powered Chat Backend with Node and Mongoose
Plus a brief overview of our sorta-but-not-really-new project, Mongoose Studio

There’s no shortage of AI chat demos floating around right now. But building a real, persistent, multi-threaded AI chat app - one that remembers what you said, summarizes long threads, and has just the right context - is a trickier challenge.
We recently built exactly that for Mongoose Studio, an AI-enabled MongoDB UI we’re testing in early access. Studio’s Chat tab is more than just a demo, it’s a serious tool for generating scripts, writing queries, and exploring data with natural language that’s saved our team dozens of hours. Not bad for something we shipped last month.
Under the hood? It’s a practical, lightweight Node.js backend that speaks OpenAI and stores conversations in MongoDB via Mongoose. In this post, we’ll walk through how it works and share the core pieces so you can build your own, or at least steal the good parts.
The complete source code for this post is in the vkarpov15/openai-chat GitHub repo. It all fits in one index.js file, and comes with a Postman collection for working with the API.
Setting Up: The Express + Axios Combo
If you’ve worked with OpenAI before, this part’s familiar. The /chat endpoint below uses Axios to call the OpenAI API’s chat/completions endpoint from Express. You just set an OPENAI_API_KEY environment variable.
app.post('/chat', async (req, res) => {
  const messages = req.body.messages;

  const response = await axios.post(
    'https://api.openai.com/v1/chat/completions',
    {
      model: 'gpt-4o',
      messages,
    },
    {
      headers: {
        Authorization: `Bearer ${process.env.OPENAI_API_KEY}`,
      },
    }
  );

  res.json(response.data);
});
Key detail here: messages is an array. Each element in the array is a message object with a role (user, assistant, or system) and a content string. OpenAI expects the full context of the conversation to be included every time you make a request. That means the entire back-and-forth history, not just the new message.
const messages = [
  { role: 'system', content: 'You are a helpful assistant.' },
  { role: 'user', content: 'What’s the capital of France?' },
  { role: 'assistant', content: 'Paris.' },
  { role: 'user', content: 'And the population?' },
];
That’s why building a persistent chat app means doing more than just forwarding a prompt to the API. You need to:
Store messages so they can be reloaded later
Append new ones in the right format
Trim or summarize older ones if the thread gets too long
Storing Conversations: ChatThread and ChatMessage
A chat app should allow users to to come back to conversations later. That means we needed to store threads, not just ephemeral messages.
You can represent threads and messages in Mongoose using the following schemas. Mongoose Studio has a similar ChatThread schema and ChatMessage schema, with a couple of extra fields.
const chatThreadSchema = new mongoose.Schema({
  title: {
    type: String
  }
}, { timestamps: true });

const chatMessageSchema = new mongoose.Schema({
  chatThreadId: {
    type: 'ObjectId',
    required: true
  },
  role: {
    type: String,
    enum: ['user', 'assistant', 'system'],
    required: true
  },
  content: {
    type: String,
    required: true
  }
}, { timestamps: true });
Threads are the container. Messages store the actual conversations. Each message has a role: the role indicates whether the message came from the end user (‘user’) or OpenAI (‘assistant’). There is also a system role for prepending instructions, like “You are a Node.js developer who writes code in pirate voice.”
Reading and Writing Messages
To interact with these models, you’ll need two endpoints: one to create a new ChatThread, and one to add a new message to a ChatThread. Below is an endpoint which creates a new ChatThread.
app.post('/chat', async (req, res) => {
  try {
    const chatThread = await ChatThread.create({
      title: req.body.title
    });
    res.json({ chatThread });
  } catch(err) {
    return res.status(500).json({ message: err.message });
  }
});
The endpoint which adds a new message to a ChatThread takes in a chatThreadId and some user specified text content. It loads all previous messages in the thread and combines the messages into an llmMessages array. Then, in parallel, it creates a new message for the user’s text and kicks off an API request to OpenAI to respond to the user’s content. Then it stores OpenAI’s response in a separate message with role set to ‘assistant’, and returns the 2 newly created messages.
app.put('/chat/:chatThreadId', async (req, res) => {
  try {
    const { chatThreadId } = req.params;
    const { content } = req.body;
    const chatThread = await ChatThread.findById(chatThreadId).orFail();

    const messages = await ChatMessage.find({ chatThreadId })
      .sort({ createdAt: 1 });
    const llmMessages = messages.map(m => ({
      role: m.role,
      content: m.content
    }));
    llmMessages.push({ role: 'user', content });

    const chatMessages = await Promise.all([
      ChatMessage.create({
        chatThreadId,
        content,
        role: 'user'
      }),
      getChatCompletion(llmMessages).then(response => ChatMessage.create({
        chatThreadId,
        content: response.data.choices[0].message.content,
        role: 'assistant'
      }))
    ]);
    res.json({ chatMessages });
  } catch(err) {
    return res.status(500).json({ message: err.message });
  }
});
System Prompt
When you’re building a chatbot, the first message in every thread will usually be a predefined system prompt that defines how the chatbot should behave.
This is where you tell the model what kind of assistant it is, like a helpful JavaScript tutor, a snarky travel agent, a regex explainer that sounds like Nicholas Cage, or anything else. This is also where you tell the model any additional rules it should follow. The system prompt goes at the start of the messages array, and OpenAI uses it to steer the rest of the conversation.
In practice, that means inserting a message like this before any user or assistant messages. For example, here is an earlier version of Mongoose Studio’s system prompt. Below is a simpler example of a system prompt.
const systemPrompt = {
  role: 'system',
  content: 'You are a developer who writes JavaScript in pirate voice'
};

const chatMessages = await Promise.all([
  ChatMessage.create({
    chatThreadId,
    content,
    role: 'user'
  }),
  getChatCompletion([systemPrompt, ...llmMessages])
    .then(response => ChatMessage.create({
      chatThreadId,
      content: response.data.choices[0].message.content,
      role: 'assistant'
    }))
]);
With this, you now have an API that writes JavaScript while sounding like a pirate. Below is a Postman example of interacting with the above API.
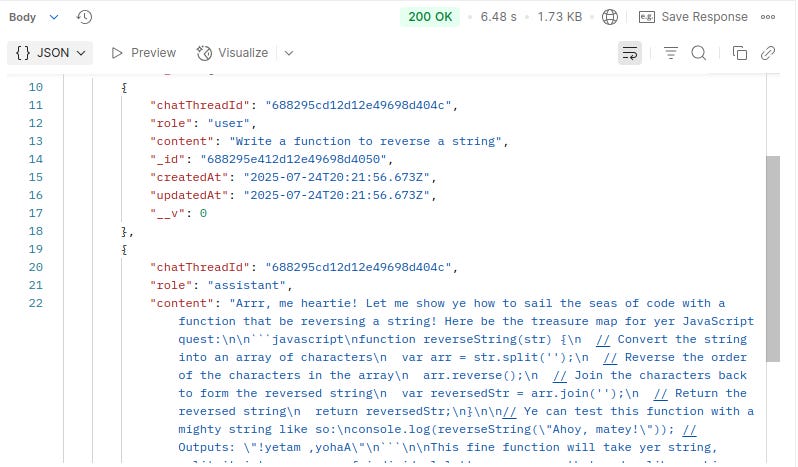
The output reads like this:
Arrr, me heartie! Let me show ye how to sail the seas of code with a function that be reversing a string! Here be the treasure map for yer JavaScript quest:

```javascript
// Arr! Here be yer original treasure map array
var treasureMap = ['gold', 'silver', 'rubies', 'pearls'];

// Use the mighty reverse() method to flip it around!
treasureMap.reverse();

// Now the bounty be reversed, from bow to stern:
console.log(treasureMap); // ['pearls', 'rubies', 'silver', 'gold']
```
Naming Threads Automatically with Summarization
One nice little feature we added: automatic titles. Like how ChatGPT automatically adds a title for your threads.
Summarization is a good use case for a smaller, faster model like ChatGPT 4.1 nano. Our code so far uses ChatGPT 4o, which is a powerful but comparatively slow model. It’s overkill for generating a short summary. Here’s the updated getChatCompletion function, which allows passing in a model name.
async function getChatCompletion(messages, model = 'gpt-4o') {
  return axios.post(
    'https://api.openai.com/v1/chat/completions',
    { model, messages },
    {
      headers: { Authorization: `Bearer ${process.env.OPENAI_API_KEY}` }
    }
  );
}
Now, you can just call getChatCompletion with gpt-4.1-nano and a summarization system prompt as follows.
const chatMessages = await Promise.all([
  ChatMessage.create({
    chatThreadId,
    content,
    role: 'user'
  }),
  getChatCompletion(llmMessages).then(response => ChatMessage.create({
    chatThreadId,
    content: response.data.choices[0].message.content,
    role: 'assistant'
  }))
]);

if (!chatThread.title) {
  const systemPrompt = {
    role: 'system',
    content: 'Summarize the following conversation in a short ' +
      'sentence 3-8 words.'
  };
  const response = await getChatCompletion(
    [systemPrompt, ...llmMessages],
    'gpt-4.1-nano'
  );
  chatThread.title = response.data.choices[0].message.content;
  await chatThread.save();
}
Managing Token Limits
One thing that’s easy to overlook when building chat apps with OpenAI: token limits.
Each request to the OpenAI API has a max context size (for GPT-4o, it’s ~128K tokens). Tokens are not the same thing as characters, and what constitutes a token differs between models, so a string that’s 650 tokens for ChatGPT 4o might be 678 for Claude 3.5 Sonnet. There’s an npm package called tiktoken which seems to be the de facto standard for computing tokens in Node.js. Below is a trimMessagesToFit() function which adds messages starting with the most recent.
const tiktoken = require('tiktoken');

function trimMessagesToFit(messages, model, maxTokens = 120000) {
  const enc = tiktoken.encoding_for_model(model ?? 'gpt-4o');
  let total = 0;
  const trimmed = [];

  for (let i = messages.length - 1; i >= 0; i--) {
    const tokenCount = enc.encode(messages[i].content).length + 4;
    if (total + tokenCount > maxTokens) break;
    trimmed.unshift(messages[i]);
    total += tokenCount;
  }

  return trimmed;
}


// Later
const chatMessages = await Promise.all([
  ChatMessage.create({
    chatThreadId,
    content,
    role: 'user'
  }),
  getChatCompletion([
    systemPrompt,
    ...trimMessagesToFit(llmMessages)
  ]).then(response => ChatMessage.create({
    chatThreadId,
    content: response.data.choices[0].message.content,
    role: 'assistant'
  }))
]);
The key is to never trim out the system prompt. Without the system prompt, you lose all the basic context and rules for your chatbot.
Moving On
That’s the core of it: a minimal but powerful AI chat backend using Node, Mongoose, and the OpenAI API. With just a few endpoints and a couple of schemas, you can build a basic chatbot.
This setup is the same one powering the Chat tab in Mongoose Studio, our AI-enhanced MongoDB UI. If you want to see these ideas applied in a real product (or just want a faster way to write MongoDB queries), check it out. You can even talk to your data in pirate voice, if that’s your thing.
The full example from this post is available in the vkarpov15/openai-chat GitHub repo. It’s all in one file, with a Postman collection to get you started.
Thanks for reading! If you build something cool with this pattern, or have questions, reply to this post or ping us on Twitter.